How to create a personalized birthday email in Mautic 4+

Blog
Posted on
personalized birthday email in Mautic 4+

How do you send automated happy birthday mails with Mautic?

We were looking for this online, and could only find an outdated blog post. So let’s get to work! We figured it out and made it super easy for you to implement. 

    You can use this mechanism not only for your real birthday but also for other occasions like: 

    • Happy New Year  / ​​Al-Hijra
    • Rosh Hashanah
    • Merry Christmas
    • Happy Hanukkah
    • Happy Eastern / Pasha (Passover) 
    • Yay, Back to School
    • Your employee anniversaries
    • The company's anniversary
    • Yom Kippur (don't send mails this day)
    • ...

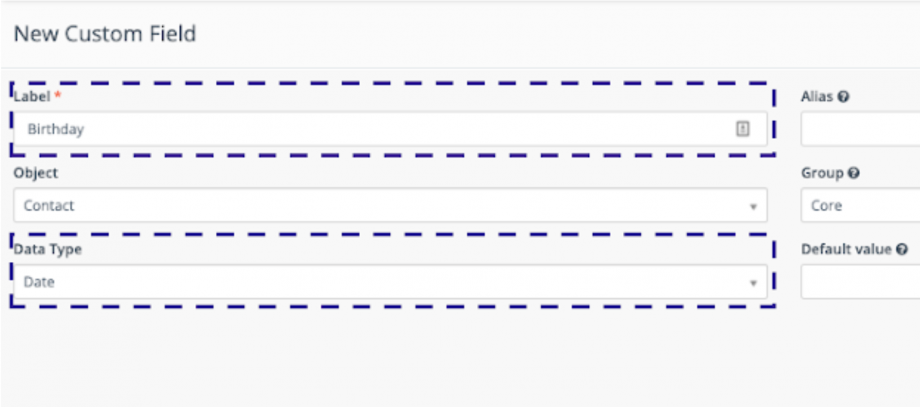
    1. Create the birthday field

    1. Start off by creating a new custom contact field for the birthday field. 
    2. Navigate to MAUTIC_URL/s/contacts/fields
    3. Click on the "New" button in the top right corner. 
      1. Make sure the Data Type is set to Date so only dates can be filled in.
    4. Save the custom contact field and continue.
    Mautic birthday field

    2. Prepare your data

    1. Create an excel with the fields shown here.
    2. Once you’ve gathered all your data and the dates are noted in the correct way (Y-M-D), export the excel as a CSV file.
    Mautic prepare data

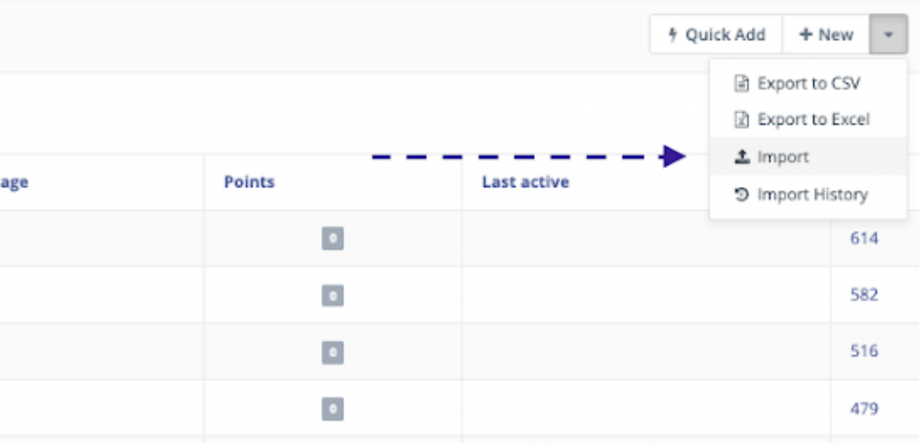
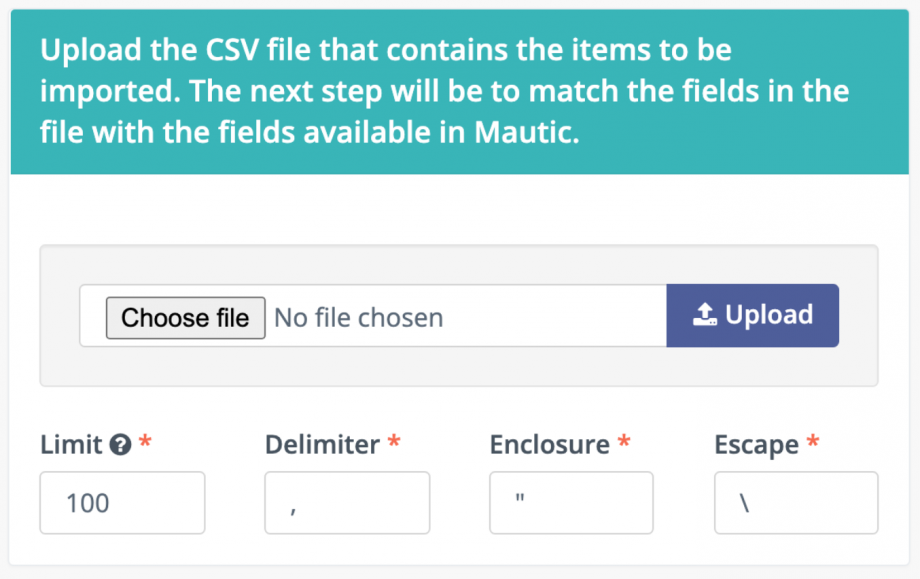
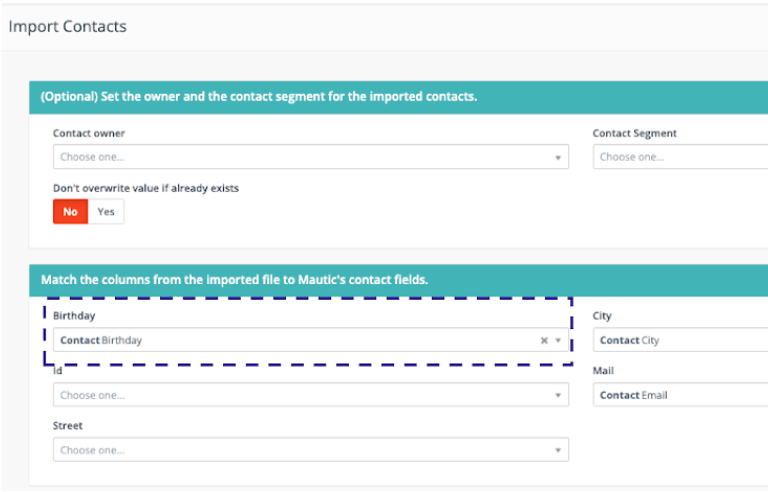
    3. Import users and their birthdays

    STEP 1: import your contacts

    1. Import the users in Mautic via a CSV file
    2. Start linking the contact fields
    3. Navigate to MAUTIC_URL/s/contacts
    4. Click on the downward-facing arrow
    5. Click on the Import button
    Mautic import contacts

    STEP 2: upload your contacts

    1. Or navigate directly to MAUTIC_URL/s/contacts/import/new
    2. Upload the file with the default settings
    Mautic - import contacts

    STEP 3: verify your data

    1. Verify on MAUTIC_URL/s/contacts that the contacts and their birthdays are correctly imported.
      (We don't want to send these cards on the wrong date). 
    2. Also: double check the date, because D-M-Y is not the same as M-D-Y.
    Mautic import contacts

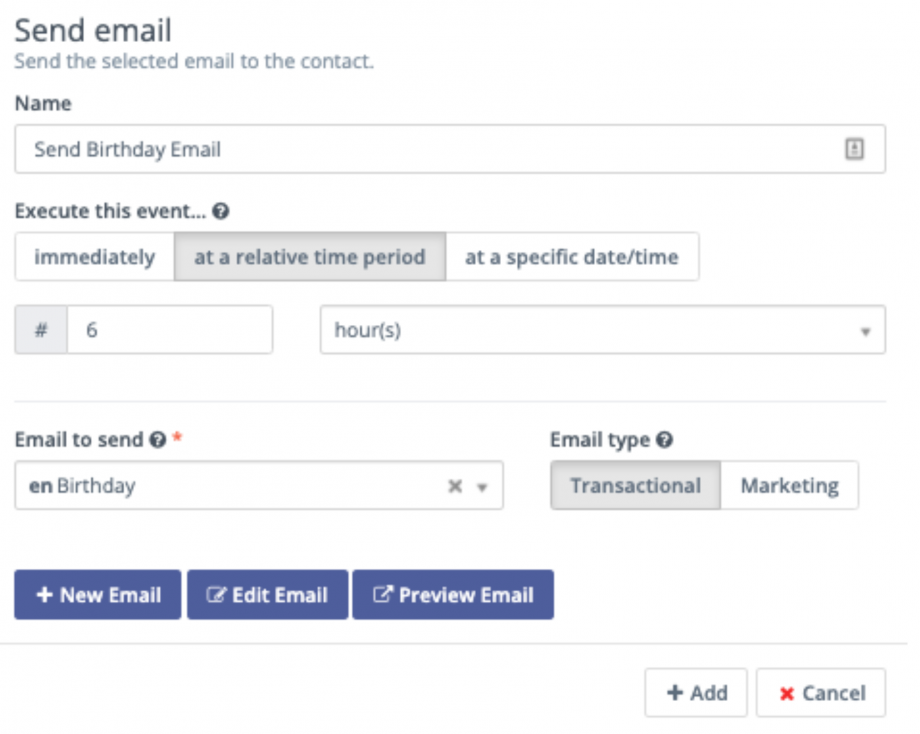
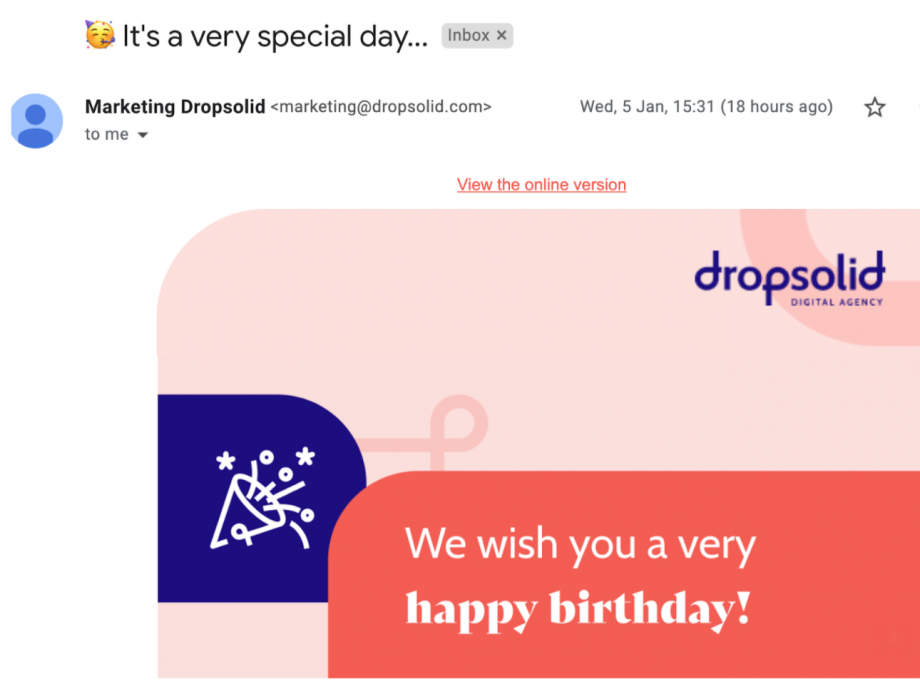
    4. Create the birthday email

    Create the email that you want to send to your contacts.

    Tip: use tokens to personalize your email.

    Mautic create email

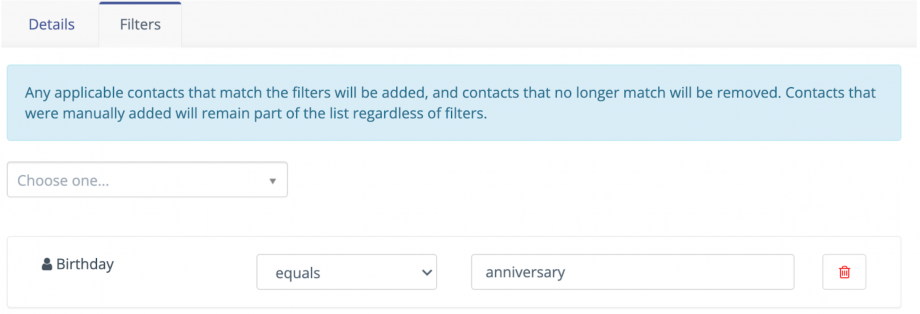
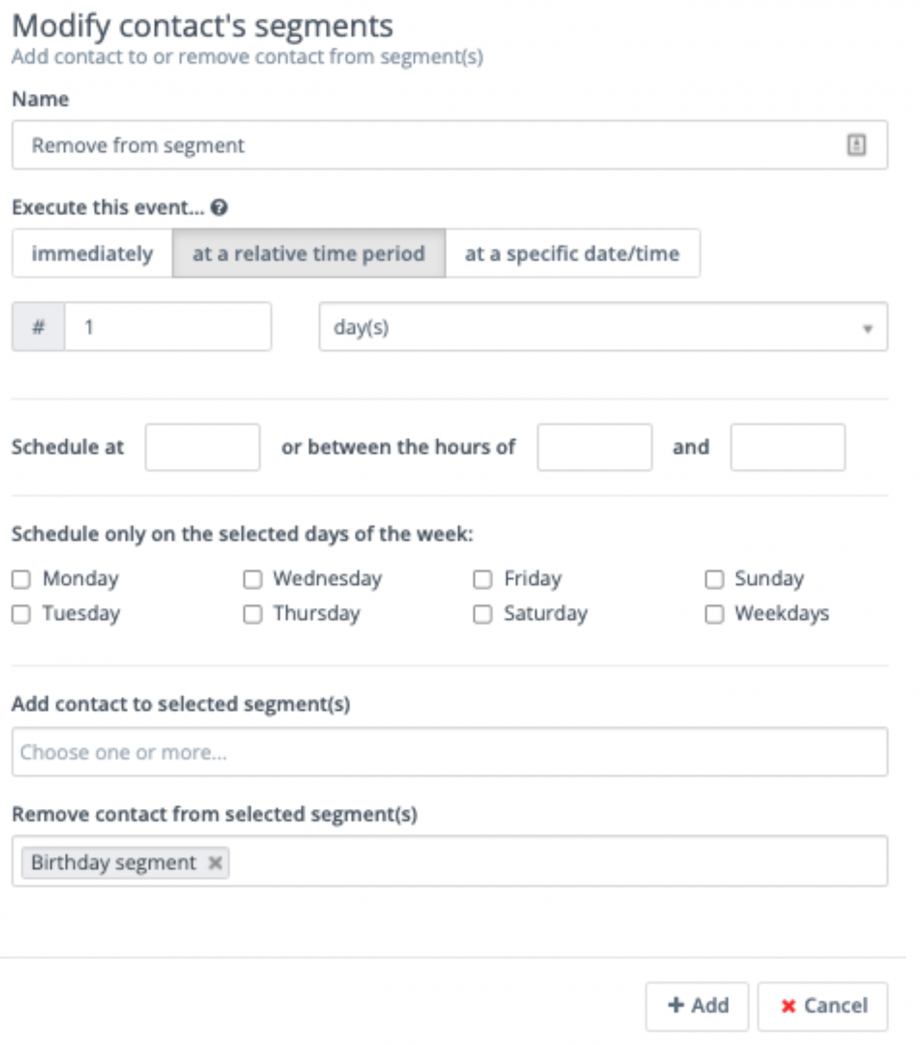
    5. Create the segment

    1. Navigate to MAUTIC_URL/s/segments
    2. Click the NEW button to create a new segment that you will later use in your campaign
      1. We are naming our segment "Birthday segment". 
    3. Under the filter tab, select Birthday as a contact that you want to filter on. 
    4. Now select equals and type anniversary to complete it. 
      1. This way, everyone who has an anniversary of their birthday will be automatically placed in the segment.
      2. This is a magic filter word. There are more of these. 
      3. Extra information on these in the chapter "Extra: Info on these Smart Dates"
    5. Save the segment.
    Mautic create segment

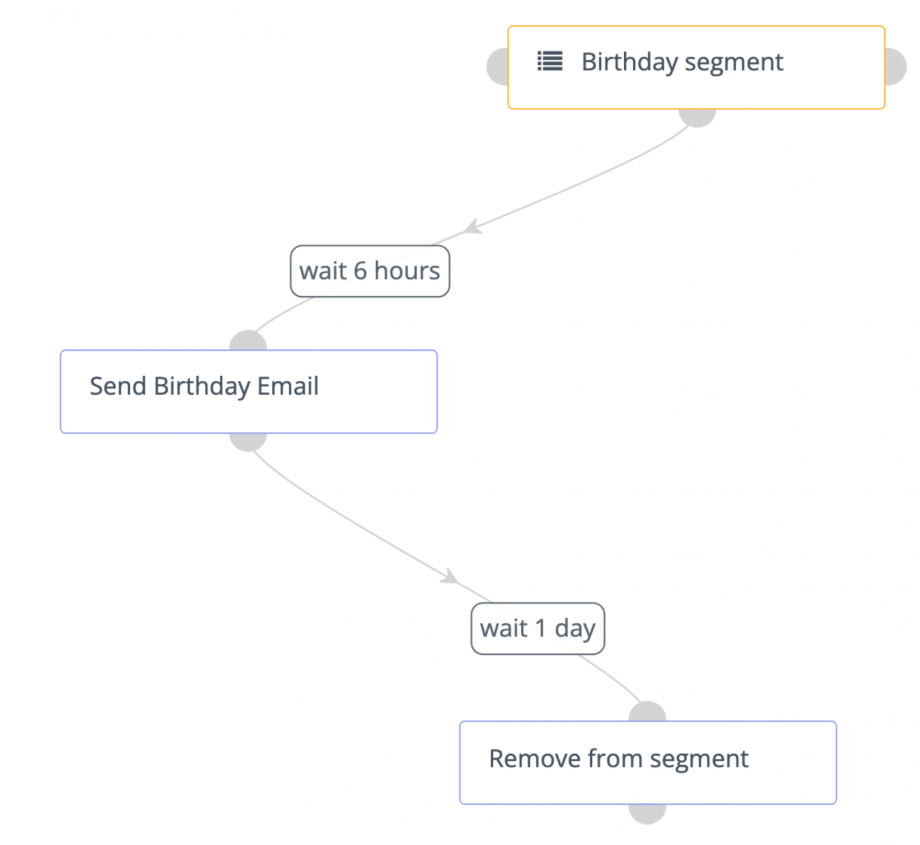
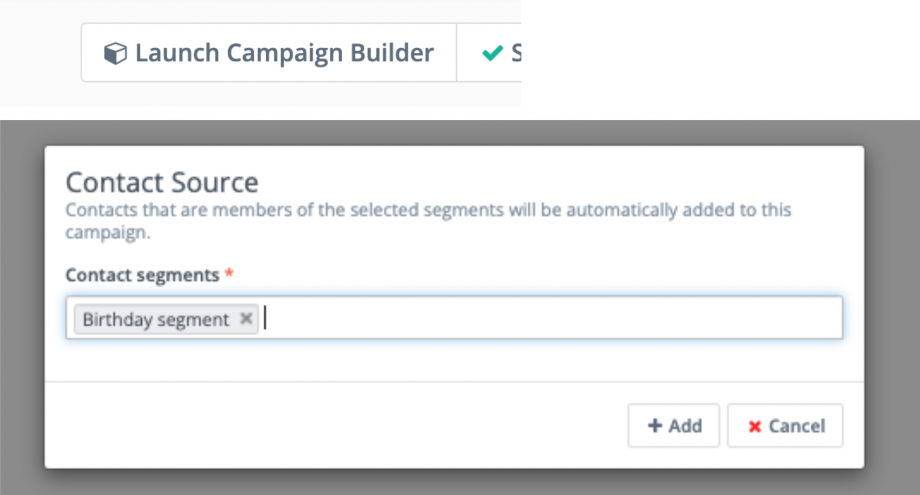
    6. Create the birthday campaign

    STEP 1: add new campaign

    1. Navigate to MAUTIC_URL/s/campaigns and add a new campaign. 
    2. Make sure that ‘Allow contacts to restart the campaign’ is on YES.
    Mautic create campaign - 1

    STEP 2: create a flow

    • We want our campaign to look like the flow.
    • Why the 6 hours? We like our mails early in the morning so that it's not buried under a bunch of other mails. 
    • Why do we remove the user from the segment after one day? Because if we do it immediately the user would be re-added and receive another birthday mail. One per year is enough.
    Mautic create campaign - 2

    STEP 3: Let's configure this! 

    1. Launch the campaign builder and select the Birthday segment as a starting point.
    2. Launch the campaign builder by editing the campaign and clicking this button.
    Mautic create campaign - 3

    STEP 4: set actions

    1. Choose ‘Send Email’ as an action and select the email that you want to send.
    2. Make sure to put a delay here if necessary.
    Mautic create campaign - 4

    STEP 5: set up the yearly return

    1. Choose the action ‘Modify contact segment’.
    2. Remove the contact from the birthday segment after 1 day.
      1. This way the contact will be automatically added the next year.
    Mautic create campaign - 5

    STEP 6: ready to publish

    1. Publish and test your campaign and your birthday emails will send out automatically. 
    2. Hooray! 🥳🎉
    Mautic create campaign - 6

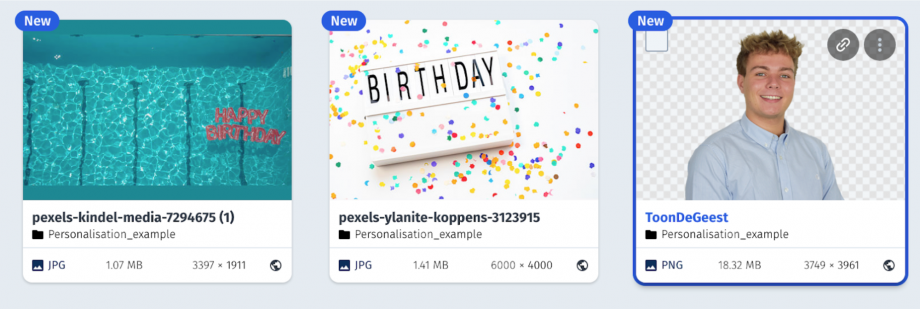
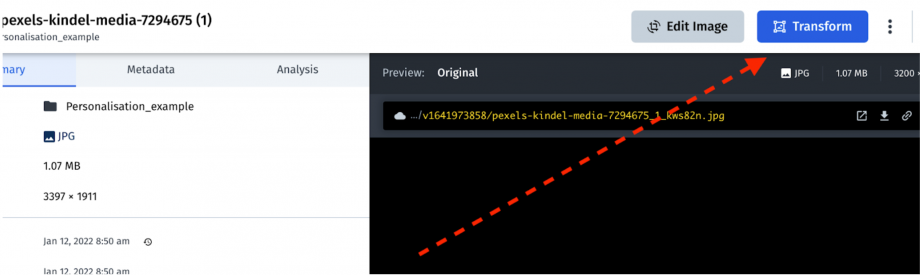
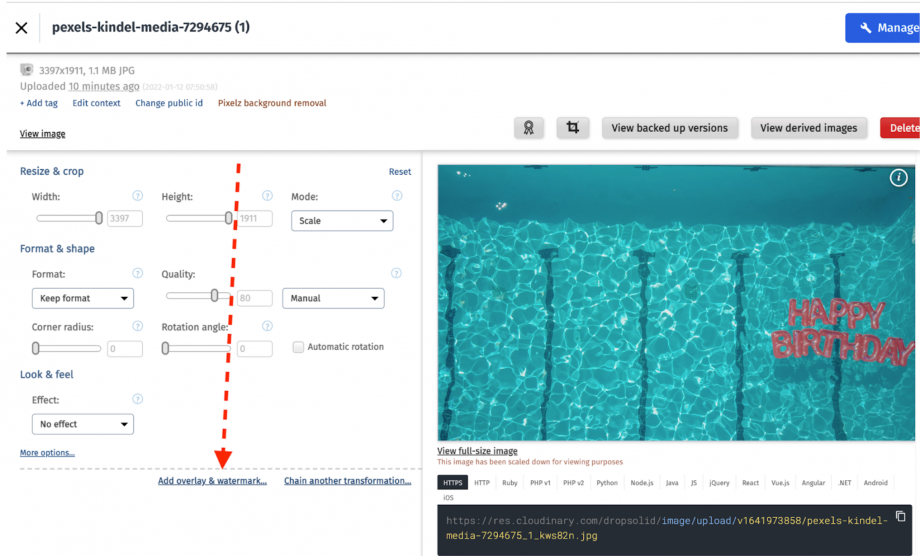
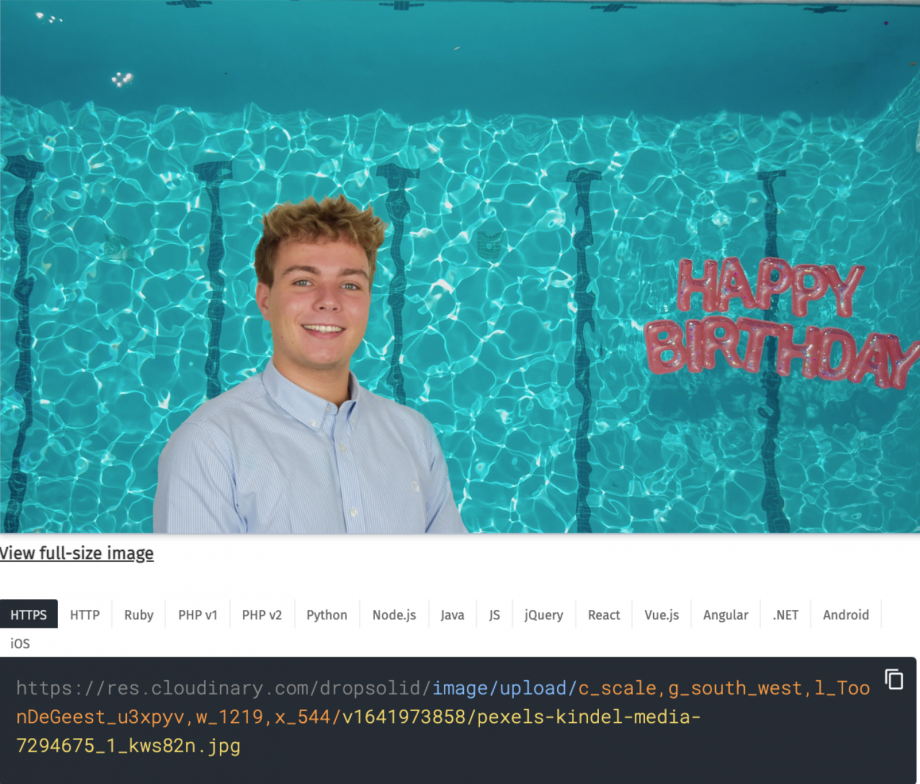
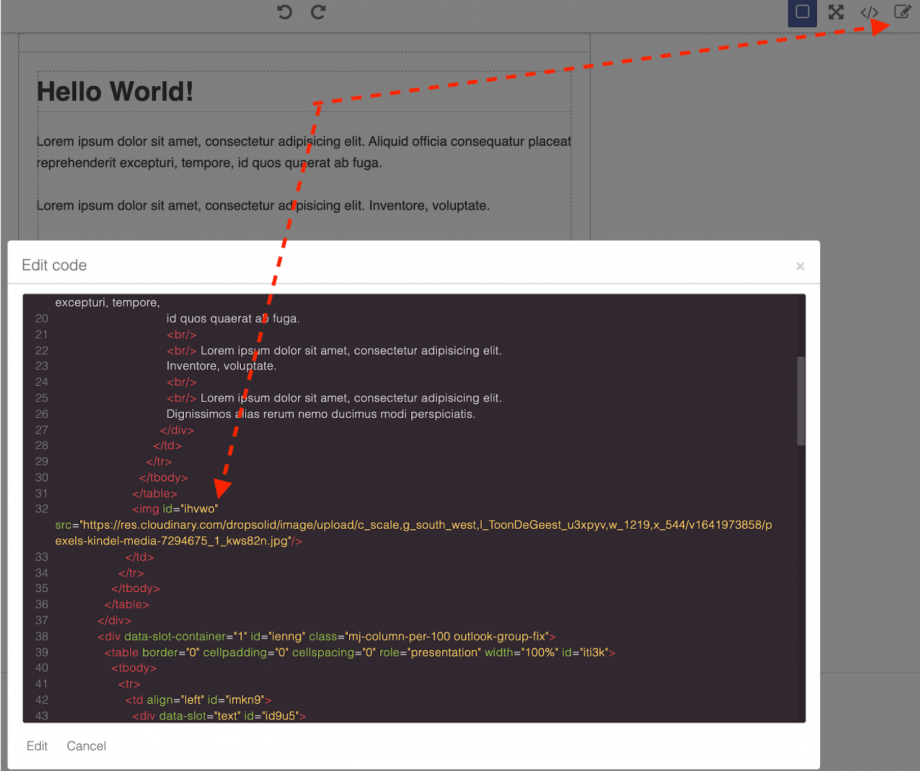
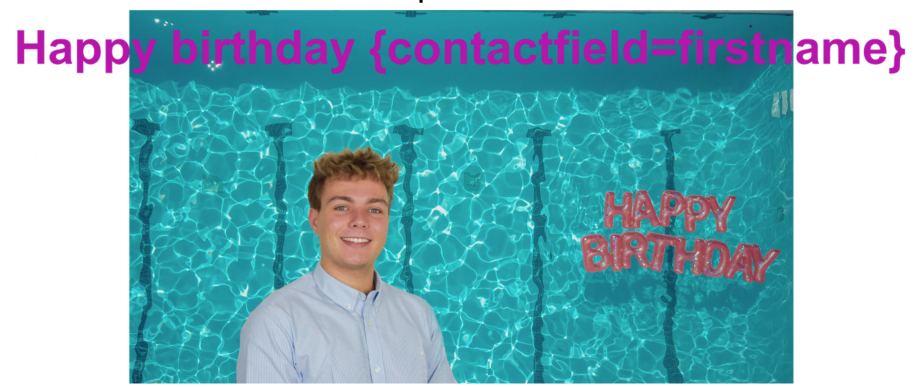
    7. Extra 1: Cloudinary personalized image as a birthday card

    STEP 1: upload your photo

    Upload your 2 files into Cloudinary. We will lay my (Toon's) face over the swimming pool. 

    Mautic personalized image - 1

    STEP 2: set background image

    1. Double click on the background image
    2. Click on 'Transform' 
    Mautic personalized image - 2

    STEP 3: add watermark

    Click on the 'Add watermark / overlay text' on the bottom

    Mautic personalized image - 3

    STEP 4: positioning and scaling

    In the appearing form, add in the "image ID" field the ID of a person (In our case "ToonDeGeest_u3xpyv"), and gravity select a place where there is space in the background image. With some positioning, your image could look like the example. 

    That's great, but that doesn't scale yet!

    • What we need for this to work in Mautic is the image ID for the users in a separate field. In the image on top, you can also see the URL. 
    • This is the URL that we are going to use in Mautic, because the image ID of the person is a parameter in this URL. https://res.cloudinary.com/dropsolid/image/upload/c_scale,g_south_west,…
    • We can dynamically alter this with Mautic to send personalized birthday cards.
    Mautic personalized image - 4

    STEP 5: configuration in Mautic

    1. Go to Mautic
    2. Edit the birthday mail you edited before. 
    3. Place an image in the mail. 
    4. Edit the mail and replace the image source with the image URL we’ve created. 
    Mautic personalized image - 5

    STEP 6: add text

    1. Add this piece to the URL: "l_text:Arial_24_bold:Colored text,co_rgb:B90FAE"
    2. My URL looks like this: https://res.cloudinary.com/dropsolid/image/upload/c_scale,g_south_west,…
    3. You see the text, g_north (gravity to the top), y 100 (100 pixels from top), and color. 
    4. It should look like the example. 
    Mautic personalized image - 6

    STEP 7: make text dynamic

    1. We are going to make the text dynamic based on the contact. 
    2. A list of the Mautic variables can be found here
    3. You can use the text and variable in the URL like this:
    4. https://res.cloudinary.com/dropsolid/image/upload/c_scale,g_south_west,l_ToonDeGeest_u3xpyv,w_1219,x_544/l_text:Arial_240_bold:Happy birthday {contactfield=firstname},g_north,y_100,co_rgb:B90FAE/v1641973858/pexels-kindel-media-7294675_1_kws82n.jpg
    5. In the editor, the token will render like the example. 
    Mautic personalized image - 7

    STEP 8: the result!

    This gives you an email personalized to your contact, like the example. 

    Mautic personalized image - 8

    STEP 9: change the background

    1. What if next year you want to change the background image? 
    2. Just change the last part of the URL:
    3. https://res.cloudinary.com/dropsolid/image/upload/c_scale,g_south_west,…
    Mautic personalized image - 9

    8. Extra 2: info on smart dates

    We’ll give you some extra magic date words you can use in Mautic.

      You can look at the source code yourself in the codebase.

      • ‘Month_last’, (midnight first day of last month)
      • ‘Month_next’, (midnight first day of next month)
      • ‘Month_this’, (midnight first day of this month)
      • ‘Today’, (if the date is today) 
      • ‘Tomorrow’, (if the date is tomorrow)
      • ‘Yesterday’, (if the date was the day of yesterday)
      • ‘Week_last’, (midnight Monday last week)
      • ‘Week_next’, (midnight Monday next week)
      • ‘Week_this’, (midnight Monday this week)
      • ‘Year_last’, (midnight first day of January last year)
      • ‘Year_next’, (midnight first day of January next year)
      • ‘Year_this’, (midnight first day of January this year)

      And then our special beasts: 

      • ‘anniversary’,
      • ‘birthday’,
      • Which test the date like so: "%-m-d"

      Let's get to work!

      We love Mautic, and we can say with confidence that we’re good at it. If you need any help implementing this, or you want to know more about the product and features, just let us know. Let’s connect and do great things together!